week//five

so a very very late submission&post of the task due before we split for the break. i was no where near close to finished and had not reached the goal i intended to - in fact wasted time trying to build a pointless definition that wouldn't have worked out, come 3D printing. i needed to review what needed to be done and the following is the out come.
grasshopper file found here. *NB Turn on the lofts and create a point next to the bounding box, and apply it to the attractor point.
part1 geometry
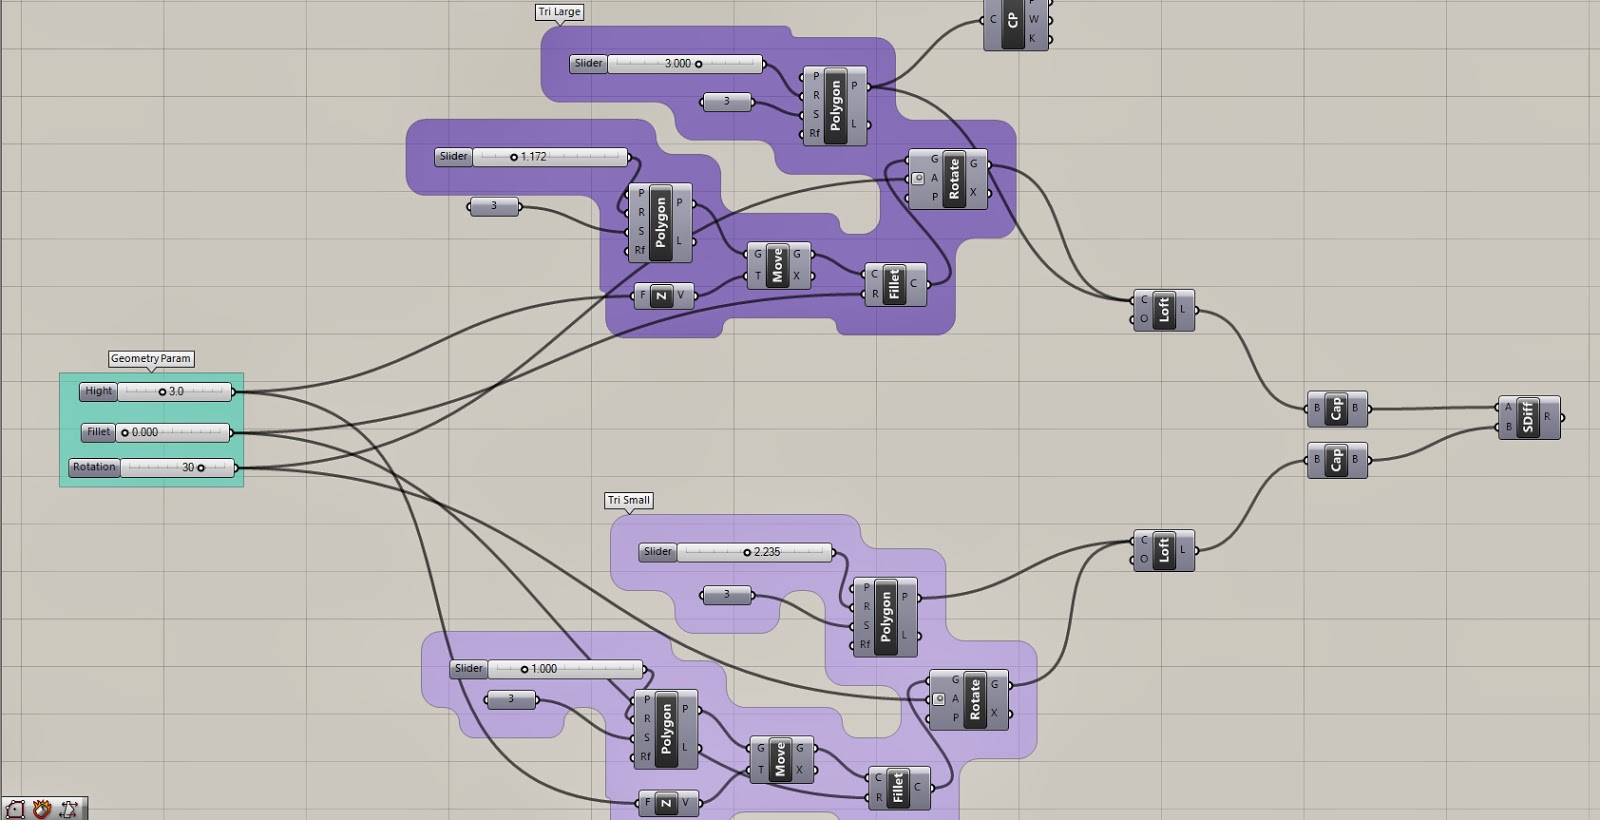
the first step allowed me to figure out the geometry i was after and apply thickness and some extra parameters that varied its height, fillet and rotation, which i hoped the attractor point would control later on. i initially thought i can use the completed geometry and apply them onto a surface but this failed (or i'm simply not sure how to go about achieving it) forcing me to go back and remodel the geometry from a tri grid. this wasn't much of an issue as i could mostly copy the logic almost as is, to get the geometry back up with the same properties.
 all i did here was start with a polygon with a segment definition of 3 for a triangle. copied the definition to make a smaller triangle and loft the two, whilst offsetting them to achieve thickness. in the process i have dragged out buttons to control the parameters for height, it's fillet (from triangle to circular form) and the rotation (to 'skew' the lofted surface. in retrospect i should have figured one thing out - as the fillet increases, the rotation of the triangle disappears since the top portion turns into a circle.
part2 grid+geometry+attractor pt+morph


No comments:
Post a Comment